Address: Office No. 204, 2nd Floor, ML Spaces, Dashrathlal Joshi Rd. Opp. Old Jain Mandir, Vile Parle West, Mumbai - 400056.
Registration
Graduate Management Admission Test (GMAT)

Registration for GMAT Exam
Here are the steps to register for the GMAT exam.
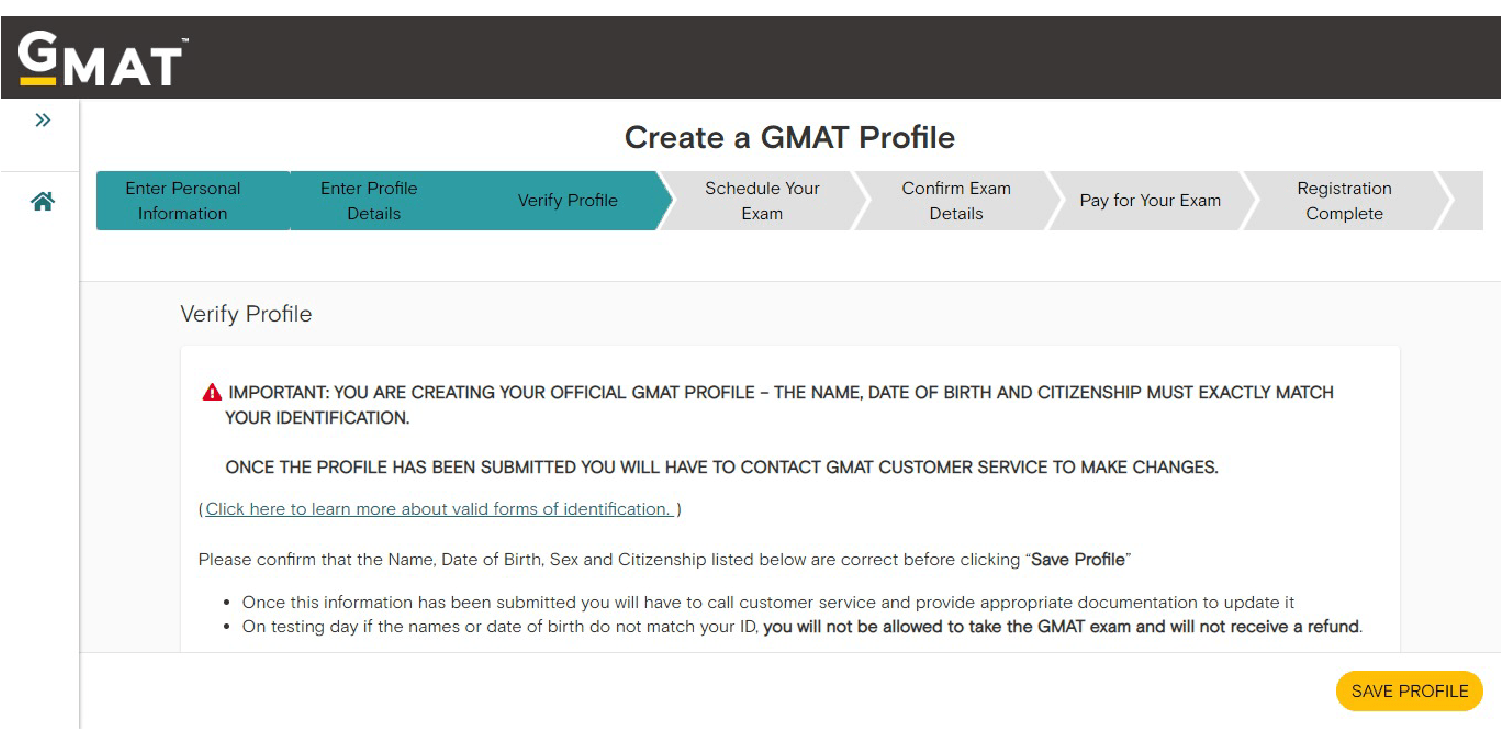
8. Enter Profile Details: Enter your gender, date of birth, and country of citizenship. Ensure to enter these details properly because if the profile is created, the GMAT customer service team can only make changes. Your GMAT profile should match the ID carried by you. If not, you will not be allowed to attend the exam and a refund won’t be issued.In the next step, you will be prompted to enter your undergraduate information, the date of your undergraduate graduation, overall academic performance, work experience, and graduate management degree information.

-
-
Email: info@collegepond.com
-
Call Us: 022-46003655
Address: Office No. 204, 2nd Floor, ML Spaces, Dashrathlal Joshi Rd. Opp. Old Jain Mandir, Vile Parle West, Mumbai – 400056.
Email: info@collegepond.com
Call Us: 022-46003655
Info
Copyright © 2002 – 2024 | All Rights Reserved | Collegepond Counsellors Pvt. Ltd.

Address: Office No. 204, 2nd Floor, ML Spaces, Dashrathlal Joshi Rd. Opp. Old Jain Mandir, Vile Parle West, Mumbai – 400056.
Email: info@collegepond.com
Call Us: 022-46003655
Info
Copyright © 2002 – 2024 | All Rights Reserved | Collegepond Counsellors Pvt. Ltd.


